
The Android app, in depth
This is the deep dive: every major surface of the Android app, its settings with their shipped defaults, and the troubleshooting that goes with them. It assumes you have already installed and connected. If not, start with getting started. For how the network behind the app works, read the overview.
Android is the most capable URnetwork client. It is one of only two platforms with per-app split tunneling (Windows is the other), and the only one that can back its kill switch with an OS-level lockdown. It also exposes the most connection machinery, including a developer screen that shows the tunnel's internals live. The app and the connect engine inside it are open source, so this page is checkable in code. No independent audit covers the protocol or the operator's server code, where the privacy claims live. Leviathan Security Group assessed this app in May 2025 under Google's App Defense Alliance MASA programme at assurance level AL2, and it passed; Leviathan scopes the work as "limited to the specific requirements of the Application Defense Alliance … and should not be read as a holistic security evaluation or comprehensive penetration test". The threat model records both 2025 third-party assessments and their limits.
The four tabs
The app is four tabs along the bottom, or a navigation rail on the side in tablet landscape. The selected tab tints pink.
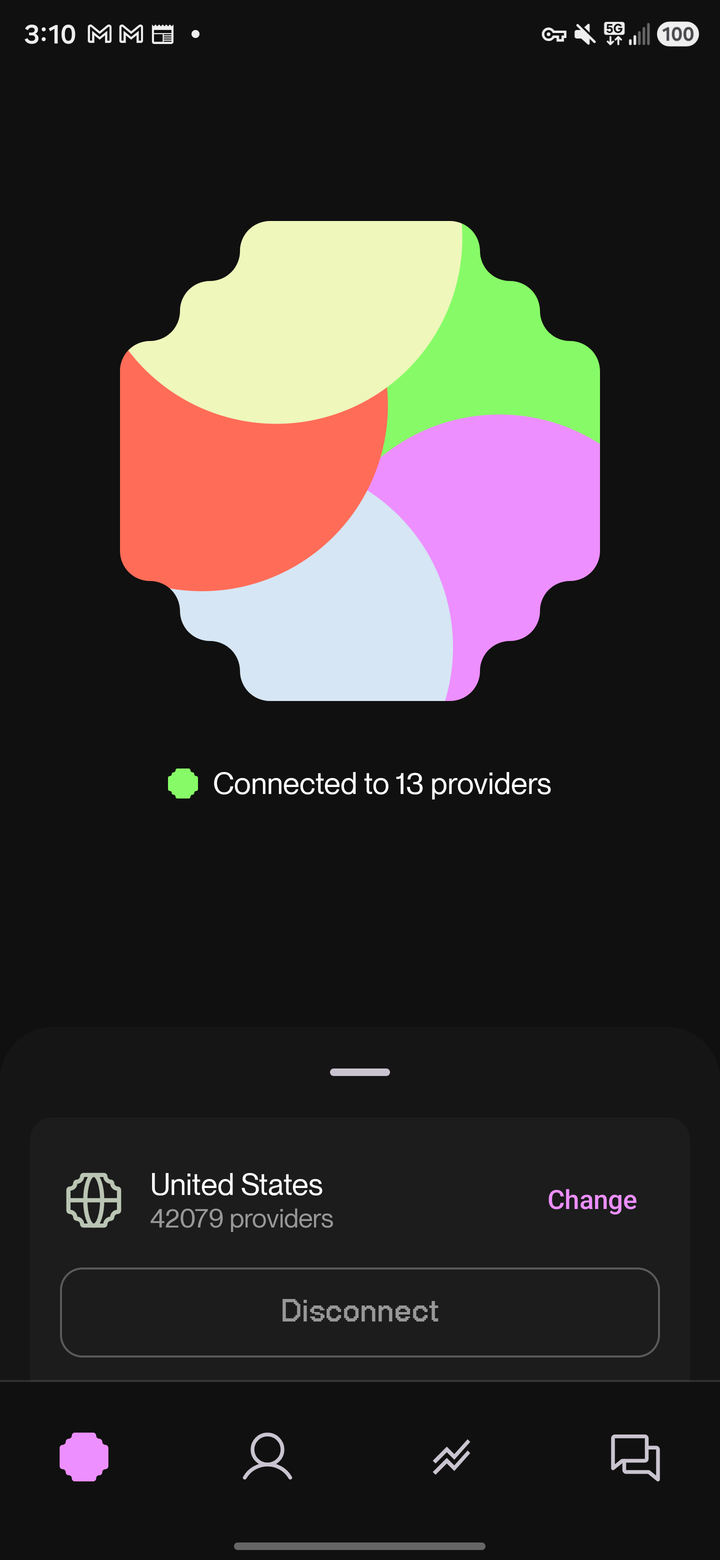
- Connect. The main screen: a 3D globe showing providers around the world, the connect button, and a bottom-sheet drawer peeking over it. Drag the drawer up for your connection status, current providers, and stats.
- Account. Your plan, your providing activity, your network name, and the entry point to Settings. Your account and network can also be deleted from Settings. That removes the whole thing, not a soft deactivation.
- Leaderboard. Provider networks ranked by their recent providing activity, updated periodically. A toggle controls whether your own network name is displayed on it. It is off by default, so you appear as an unnamed row until you opt in.
- Support. Reaches the team at feedback.ur.io, with a button to share the app's log files (more in Troubleshooting).
How connect actually works
Tapping connect starts MainService, an Android VpnService that owns a tun device configured with:
- MTU 1440, read in non-blocking mode
- IPv4 and IPv6 DNS servers routed into the tunnel
- per-app allow/disallow lists (this is what split tunneling drives)
- the app excludes itself from its own tunnel, so control traffic to the platform (itself always TLS-encrypted) never loops through the tunnel it is managing
From the tun device, traffic follows the network's short multi-hop path: you → extender → operator → provider → internet. The extender is a reachability hop that forwards your encrypted session without reading it; as your first hop, it does see your address. The client holds several providers at once, keeps each site on one provider so services see a stable address, and moves flows off any that underperform. The overview explains the full path, why it stops at four legs, and the provider window.
What matters for this app's controls is the split across the two relay parties. The provider never learns who you are, because the operator sits in between. The operator cannot read what you send once the session is sealed end to end to the provider. On a stock install only the first holds: the seal is a switch that ships off, so until you turn it on the operator relays packets it can read. The controls behind the split are Post Quantum Encryption and Strong Anonymization, both in the connect drawer; Strong Anonymization ships on and Post Quantum Encryption ships off. The three states they produce:
| Mode | Operator sees | Provider sees | Default and availability |
|---|---|---|---|
| Relayed sealed | your account and source connection, which providers you are on, and ciphertext with its timing and volume | destinations it egresses and a device/contract id, not your real IP | opt-in: switch on Post Quantum Encryption in the connect drawer |
| Relayed standard | your account and source connection, which providers you are on, and the destinations and packet bytes inside | destinations it egresses and a device/contract id, not your real IP | the shipped default: Post Quantum Encryption, off in the connect drawer |
| Direct | less relay involvement | your real IP and the destinations it egresses | opt-in: switch off Strong Anonymization |
Limit: nothing verifies that the providers offered to you are independent of each other or of the operator, and the operator can run providers itself. The threat model works these rows against named adversaries, including a hostile operator, and is explicit about where each one fails.
Around the service:
- Always-on VPN is supported. The app declares the
SUPPORTS_ALWAYS_ONmetadata, so in system Settings → Network & internet → VPN → URnetwork you can enable Always-on VPN and Block connections without VPN (lockdown). - Boot autostart. A boot receiver restores the connection after a restart, so a phone that reboots overnight comes back connected.
- Battery and thermal awareness. The service watches battery-saver and thermal state rather than fighting the OS.
- A quick-settings tile toggles the connection from the shade, with one limitation covered in Troubleshooting: it cannot show the first-run VPN consent dialog.
Choosing providers
The location picker opens from the Connect tab. Best available provider is the default and lets the network route you to fast, reliable providers continuously. Below it, browsing the list shows countries, each with a live count of providers currently online there. Start typing and the results split into Regions, Cities and matching devices. City-level targeting is reached by searching for the city, not by scrolling down to it.
The counts are live member devices, so they rise and fall with the time of day. A location is listed only while a member's device is online in it, and the platform derives the city from the connection it observes rather than trusting a provider's own claim. A provider that hops between address blocks or cities is marked invalid and drops out of the counts and the routing. Limit: an address that looks like a datacenter or a VPN is detected and demoted, not banned. The overview covers coverage and location truth in full.
Settings and the connect drawer
Android's controls sit in two places. Settings, behind the Account tab, holds provide mode, the kill switch, device location sync, the battery exemption, your seedphrase, account deletion and the developer screen. The connect drawer, dragged up on the Connect tab, holds Fixed IP, Strong Anonymization and Post Quantum Encryption, the split rules and Custom DNS below, the ad and tracker blocker, and live traffic charts.
The connect drawer's settings:
| Setting | Default | Effect | Main cost |
|---|---|---|---|
| Strong Anonymization | On | Keeps the operator between you and the provider, so the provider never sees your real IP | Slower than the direct path |
| Post Quantum Encryption | Off | Seals the session end to end to the provider, so the operator relays bytes it has no key for | Skips providers it cannot seal with |
| Fixed IP | Off | Narrows the provider window to one exit, so every site sees one steady address | Gives up the plural exit |
| Block ads and trackers | Off | A device-level filter over everything the tunnel carries, applied the moment you flip it | Filtering is tunnel-wide, not per-app |
- Turning Strong Anonymization off is direct mode: the anonymization hop drops out, throughput rises, and that provider sees your real address. Identity by default, speed if you ask.
- The seal is fail-closed. While Post Quantum Encryption is on, the client will not send or accept application data in the clear: a provider it cannot establish a sealed session with is skipped, not used unsealed. The cost is availability, not confidentiality — you lose that provider, not your encryption. Every current provider build speaks the responder side, so losing one is uncommon. With the setting off, as it ships, traffic takes the standard relayed path. The app shows no per-connection sealed-or-not verdict.
The Settings toggles:
| Setting | Default | Effect | Main cost |
|---|---|---|---|
| Provide mode | Never | Shares your spare bandwidth with the network, or with your own devices only | Bandwidth, and battery unless exempted |
| Allow providing on cellular network | Off | Lets providing run on mobile data, not just Wi-Fi | Providing can spend your data plan |
| Kill switch | Off | Stops local fallback when no provider is reachable | No traffic when providers fail |
| Sync device location | Off | Apps see your longest-held provider's location instead of your real one | Affects every app on the device; cleanup needs care |
| Ignore battery optimizations | Off | Requests the system exemption that keeps the tunnel and providing alive in the background | Removing it later goes through system Settings |
Each of these has its own section below.
Split tunneling: two levels
Android has both kinds of split tunneling, and they compose.
Domain and IP rules. Add rules that allow or block specific domains and IP ranges from the tunnel. Use this to keep your bank's site on your local connection, or to force only certain destinations through URnetwork.
Per-app rules, shared only with Windows among URnetwork clients: VpnService is the only platform VPN API that can route by app natively (Windows needs a dedicated driver for the same trick). Each app can be:
- Excluded. That app bypasses the tunnel entirely.
- Included. Here is the important switch: including any app flips the tunnel into allowlist mode. From then on, only included apps use the tunnel; everything else goes direct. Exclude-only lists keep the default everything-tunneled behavior.
- Pinned. That app's traffic sticks to a single provider, so services that dislike a changing exit address see one stable IP.
Custom DNS
By default the app uses its most secure configuration: encrypted DNS over HTTPS, resolved through the tunnel. The Custom DNS screen lets you trade that off deliberately:
- DoH, remote. Encrypted, resolved beyond the provider. The default.
- DoH, local. Encrypted, resolved from your side.
- Unencrypted, remote or local. Plain DNS, if something in your network requires it.
- Recommended settings per country. Sensible presets for places where specific resolvers work better or are required.
- Restore to most secure settings. One tap back to encrypted DoH through the tunnel.
The Block ads and trackers toggle sits under the same card. It is not a DNS mode but the device-level filter from the table above, applied to everything the tunnel carries the moment you flip it.
Kill switch
The kill switch disables falling back to the local route. Normally, when no provider is reachable, the client can route traffic over your local connection so you are not stranded. With the kill switch on, it will not: traffic stops rather than leaving your device outside the tunnel. It ships off.
It also has a second effect. Traffic your own device's security filter classifies as a drop (see Provide mode) goes out over your local connection while the switch is off, and is blocked outright once it is on. Anything tripping the file-sharing signature is blocked either way.
That is the app-level guarantee. For an OS-level one that holds even if the app dies, add the system's Always-on VPN plus Block connections without VPN in Android's VPN settings. The two are complementary: the toggle governs the client's routing decisions, lockdown makes Android itself refuse non-tunnel traffic. Every URnetwork app ships this toggle; what Android adds is the OS-level lockdown above. The browser extension has its own, on by default.
Provide mode
Providing is off by default. Four modes:
- Auto. Provide publicly while you are connected as a client, and fall back to serving only your own devices when you disconnect.
- Always. Provide publicly, connected or not.
- Network. The private provider: always on, but only for your own devices.
- Never. The default. No providing at all.
Sharing your connection is filtered on your own device. The connect engine's open-source ip_security layer inspects traffic right at your device's exit and drops file-sharing (think BitTorrent) and attack-pattern traffic before it leaves your connection with your address on it. The same layer runs on your own outbound traffic too, so it is not a rule you impose on strangers and escape yourself. What gets recorded is a local counter: packets and bytes blocked, by protocol and destination port, and nothing else. No address, no domain, no packet contents. A file-sharing match does raise an abuse flag to the operator, but it names the device that sent the traffic (not you, when you are the one carrying it) plus a boolean, and the operator ships no handler for it today. Attack-pattern and opaque-tunnel drops raise nothing at all. The filter removes the traffic behind most abuse complaints before it reaches your line, and its threat lists are rebuilt from public feeds with each release. The terms of service cover providing.
Public providing is participation in the UR protocol, and the traffic you carry is metered under signed contracts. ur.xyz documents how the rewards for that participation work; the Account tab is where your own participation shows up.
Two settings ride along. Allow providing on cellular network, directly under provide mode, is off, so providing stays on Wi-Fi until you say otherwise. Higher up Settings, under General, Ignore battery optimizations handles the other cost: Android aggressively puts background apps to sleep, which is fatal to a provider that should be serving traffic while the phone sits on a charger. The toggle requests the system exemption. To remove it later, Android requires you to go through App battery usage in system Settings yourself.
Sync device location
An optional feature that makes apps on your device see the location of the provider you have been connected to the longest, instead of your real location. It uses Android's mock-location mechanism, so it requires enabling Developer options and selecting URnetwork as the mock location app. The setup screen walks you through it and states the limits: it affects every app on the device, apps can detect that the location is simulated, and you should turn it off in URnetwork before deselecting the app or uninstalling. The Troubleshooting section explains why that last one matters.
Instant accounts, and the seedphrase you must save
You do not have to hand over an identity to start. Create Instant Account on the login screen makes a real, permanent network: tick the terms box, tap once, no email, no phone, no password. What secures it is a seedphrase: words the platform generates, shows you once immediately after creation, and afterwards keeps only in hashed form. The account already exists when that screen appears, so backing out does not undo it. Whether you save the phrase or dismiss the screen, you land in the app with a live account. That single fact is the whole limits story:
- The seedphrase is the only credential. Write it down before you tap past that screen. Support cannot recover the account without it, because the operator holds nothing it could recover it from.
- Saved, it makes the account durable in a way a device-local identity never is: reinstall the app or move to a new phone, sign in with the phrase, and your network, plan and history come back with you.
- The free tier's daily allowance applies, as it does to any free network. When it is spent, data stops moving through URnetwork until the allowance refreshes (current numbers live at ur.io/products).
An anonymous account is not a limited one. A crypto-wallet signature is a second email-free way in, and you can attach an email or phone to the same network later if you want a familiar way back. Settings carries Generate Seedphrase, so an email account can add a recovery phrase afterwards, or rotate the one it has. The old phrase stops working; the new one shows once.
Deep links
The app registers for two kinds of links:
https://ur.io/c...links are verified app links, checked against the site'sassetlinks.json, so they open directly in the app with no browser chooser.ur://is a custom scheme for handing actions to the app from other apps and tools.
Troubleshooting
Connect does nothing, or the tunnel never comes up
The most common cause is that the system VPN consent was never granted: a dismissed dialog, or another VPN app holding always-on, which makes Android silently refuse a second one. Open URnetwork itself and tap connect so the consent dialog can appear. Check system Settings → VPN if another app has Always-on VPN enabled.
The quick-settings tile won't do the first connect
By design of Android, a tile cannot show the VPN consent dialog. Your first connect after install (or after revoking VPN permission) must happen inside the app. The tile notices the missing consent and opens the app so you can finish. After that, the tile works on its own.
The tunnel dies in the background
Battery optimization is almost always the culprit, especially on aggressive OEM builds. Turn on Ignore battery optimizations in Settings; it opens the system exemption prompt. If your device has a vendor battery manager (Xiaomi, Huawei, Oppo and friends), exempt URnetwork there too.
Device location is stuck after using Sync device location
Android never removes mock location providers on its own: not on app crash, not on force-stop, not even on uninstall. And if you deselect URnetwork in Developer options (or turn Developer options off) while the feature is active, the app loses the ability to clean up. Your device's location stays frozen at the last synced city until you either re-select URnetwork as the mock location app and turn the feature off, or reboot the device. This is why the app tells you to turn the feature off first. The feature also cleans up leftovers automatically on its next launch when it can.
Sharing logs with support
The Support tab has a share button that packages the connection SDK's log directory into a shareable file. Attach it to a report at feedback.ur.io. Logs describe the tunnel's behavior, not the contents of your traffic.
When you want to see the machinery
At the bottom of Settings is a developer screen with live connect internals: provider connect failures, how failures are judged when your own uplink was silent, probe results, and tunables for provider selection. If you are debugging a flaky connection or writing a good bug report, it is the most information-dense screen in the app.
Elsewhere
The overview explains the network end to end, the FAQ answers the common questions, and the other platform guides live at iOS, macOS, Windows, Linux, and the browser.